Monday 25 February 2013

Some Spoonflower Weekly Contest Results

So I didn't think there was a way for me to find out how I went in the Spoonflower weekly contests, unless I came in the top 10. But I've since found that information in the blog posts announcing the winners! So exciting! I didn't totally suck! (I love not totally sucking).

So first up back in August was Pencil Pals.


Ranked 51 out of 171 with 165 votes (the winner got 639)

Then we rush straight to the Christmas designs with Secret Present Gift Tags.


Ranked 71 out of 152 with 77 votes (the winner got 468)

Most recently (also for Christmas) was Gingerbread Gentlemen.


199th out of 207 with 44 votes (the winner got 281).

I seem to be getting worse... although the various statistical analyses that suggest themselves to me are just too much effort!

Still, realising that people who don't know me must have actually voted for my designs is quite exciting. I think I might keep an eye on the upcoming contests and try again.

Thanks to all my friends who voted and helped me with ideas and titles.

In other exciting news, someone has bought a fat quarter of pencils pals! My first fabric sale (not including my dad). Awesome.

Sunday 10 February 2013

Soft Toy Pattern Review: Whale by DIY Fluffies

I was keeping a covetous eye on the soft toy patterns by DIY Fluffies on etsy for a while, and it was the Zombie Bear that finally spurred me into action. But since I was buying, I got a bundle of 3 patterns to "save money". The others were the whale and the elephant.

Mariska's patterns are beautifully set out with adorable illustrations. The whale is pretty straightforward in theory, but curvy, so a bit tricky. The recommended skill level is intermediate, and I would agree. Experience with clipping curved seams will help a lot.

Seam allowances are not included, which is not the best arrangement for me, as my skill at adding them in evenly is not great (the fins are most notably quite different sizes on mine!).


My eco-whale is made from an unwanted tie-dyed apron project that a student left behind at school to be thrown in the bin. The stuffing is a mix of Innergreen's corn fibre fill and fabric scraps, including the left-over apron. I'm finding that as long as you keep the ball of scraps in the centre and surround it with the regular fill, the cuddliness is not impaired (especially on a very round bosy like this one).

I love the shape of this whale, especially the curve up of the tail. Also, the shape at the front reminds me of a soft toy whale I had as a kid. He was yellow and white fur fabric and we got him at a school fete jumble sale. His name was Belly Whale. I feel like there was this period in my life when I let having no space to store soft toys get in the way of my love for them. I miss Belly Whale, and many others who went off to Vinnies. I hope they are still being loved somewhere.

Tuesday 5 February 2013

Embroidery Class 2012 in review - Pulled and Withdrawn Thread Work

The third module of the basic course was Pulled and Withdrawn Thread Work. I had no experience at all of this going in and was excited to try.  They are worked on evenweave fabric with threads that can be removed, rather than an Aida or Hardanger which has a stiffer weave. Linen is the best.
Pulled thread work used tight tension to pull the threads together to form patterns. Withdrawn thread work removes weft or warp threads and then manipulates the remaining threads. Easier to show than to tell!

We worked a sampler for each technique, and put some hemming techniques on each one also. Then as our assignment we had to make a small project that contained 1 hem and examples of each.
Again, as these are samplers, I've scanned them and labelled them for future reference.
This is my withdrawn thread sampler:

Withdrawn thread sampler.
It contains several ways of treating the leftover threads: ladder and zig-zag hem stitch, three styles of interwoven hemstitch, some wrapped hemstitches, and an Italian double hemstitch in both ladder and zig-zag. It also shows a Picot hem stitch at the top, and a corner example with a spider's web interlacing.

And here is my pulled thread sampler:

Pulled thread sampler.
This has both straight and diagonal stitches as well as a variety of eyelets, a 4-sided stitch hem at the base, and a traditional hem stitch at the top.

For my project, I did a small bag that could be used as a smart phone cover. I did a deep 4-sided stitch hem at the top, zig-zag ladder hemstitch, a double row of 3-sided eyelets (which I think look like little flowers), and some interlaced hemstitch.  Then there are two satin-stitch edged squares. The one on the front has a spaced satin stitch and a wave stitch.

Small bag assignment - front - featuring pulled and withdrawn work.
The one on the back has two diagonal stitches: diagonal cross stitch and step filling.

Small bag assignment - back - featuring pulled and withdrawn work

It ended up being a cm shorter than it needed to be, so I might line it with a dark fabric that extends up at the top. Or I'll wait and buy a smaller phone. Or use it for something else.

I've fallen in love with this style. It needs a lot of preparation, with proper gridding of the fabric, and the withdrawn thread work and the various hems (4-sided in particular) take a lot of time to set up. But the actual pulled work and hemstitches are fast once you've done the preparation, I love the texture it produces, and for white on white... magical.

I've started a piece to be a back sleeve for my kindle - i.e. one that can be on while I'm reading it, to protect the back from my finger smudges.

Kindle sleeve underway 

You can see that I still have sections on either side of the central row of eyelets to fill in.The outline is the first stage of the 4-sided stitch hem - the rest will be done after the corners are mitred.

Monday 4 February 2013

Embroidery Course 2012 in review - Counted Thread Embroidery

The second module of the year was Counted Thread Embroidery, with sub-topics of counted cross stitch, Assisi work, blackwork, Hardanger and pattern darning

I've been doing counted cross stitch since I was five years old, so I wasn't anticipating much from that section. We covered the basics very quickly and moved onto some variation stitches, and talked about design. Our project for this topic was to make a name badge - design it, stitch it, assemble it. I knew that stitching my entire first name in cross stitch could make the name badge relatively big, so I did the first letter as a decorative capital in plain cross stitch and the rest of my name in backstitch.

My counted cross stitch assignment name badge

We had to show several variations, so I used long-armed cross stitch for the borders (with one corner on a diagonal) and double cross stitch in the other corners. The decorative 'stars' or 'flowers' are interwoven cross stitch.
The core of the badge is template plastic - better than card, as that makes it washable. I used a decorative double knot stitch (a stitch from surface embroidery) to cover up the joins, and used buttonhole to add the brooch back. Buttonhole is the best stitch for adding these sorts of things - press studs, too.

Double-knot stitch acts a near finish to the stitched seam.

Blackwork is another topic where I had some experience, but I picked up so many good tips on making my Holbein (double-running) stitch look more even.  We had to work the given pattern, to show the way stitches can be gradually built up to give a depth and intensity. It isn't reversible, which is a shame, as that is part of what I really love about blackwork, but I do like it.

The blackwork pattern worked in class. 
 We were asked to finish it as a bag. I didn't add a drawstring to it, and I'm currently using it as a bag for my Kindle!

The blackwork design made up into a bag. 
Assisi work combines the previous two techniques, and is basically where you work the background in cross stitch, leaving the motif, outlined in black, in the background fabric. Traditional Assisi work is very ornate and tends to be religious or floral patterns. The order matters for formal Assisi work - the first step is to do the outlines in double running stitch. Lots of modern Assisi patterns say to do it in backstitch, but double running doesn't give a shadow. Then you fill in the background, and then you stitch the ornate borders. We didn't have a lot of time for Assisi in class, and I stitched only a few small examples.


The small bird is very traditional, with its border. The bow is my attempt at a modern Assisi design.

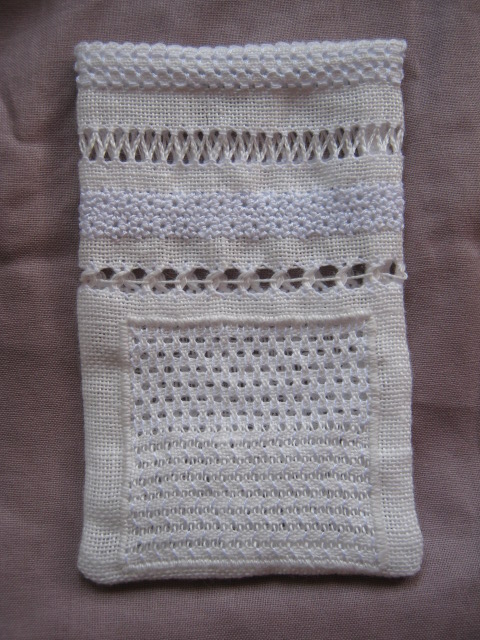
The two techniques that I hadn't done at all before were pattern darning and Hardanger.
Hardanger I'd seen before, of course, as it is very popular, but I'd never tried it. I liked the stitching process itself- lots of precision counting - but the cutting of the threads was nerve-wracking. I discovered my scissors are not as good as I'd thought - or my scissor technique sucks. I was working in colour on white for our work in class, but switched to white on white for my assignment piece, because that way the tiny threads that remained weren't so obvious.  I made a bookmark, and placed a white grosgrain ribbon behind the design. That way I got some contrast, to show the design, but still white, so didn't make the threads obvious again.

My hardanger bookmark assignment.
I liked this technique, but unless I had a specific gift in mind I don't think I'll be doing a lot of it again. Not my favourite.

Pattern darning is awesome. You create a pattern by weaving a thread in and out of the fabric to create a reversible design. Our class project was a bookmark made on a piece of aida band, which was easy as each line of the band took its own threads, and they ended in the fringe (anchored with a buttonhole stitch).

Pattern darning bookmark front.
Pattern darning bookmark back.
Many other patterns are far more intricate and complicated, and I've been experimenting a bit with this technique and fully intend to do more.

So while I entered this module expecting to get a limited amount out of it, given my prior knowledge of counted thread work, I'm very happy with how much I learnt.

Sunday 3 February 2013

Soft Toy Pattern Review: Naked Frog

 
Well, at the moment it is naked. And in the magazine it is called either "swimsuit frog" or "ballet frog" depending which version you make, so mine is clearly currently "naked frog".


The one on the right is a backpack. Apparently it's ok to be naked if you are a backpack.

It's the Australian Women's Weekly "Handmade" from November/December 1998.


I picked it up at an op-shop, drawn in by the Christmas delights it promised, but it was the frogs that sold me. 50 cents well spent.

So, with a need to motivate myself back into craft after my trip, and with miles of pale green fleece left over from the elephant, I got to it.

The pieces were confusing at first, and covered with markings that I largely ignored, but it came together pretty easily. Probably the only tricky bit was sewing the front and back together with those GIGANTIC and already stuffed legs attached and having to be kept inside and not caught in the seam. I basically had to squeeze them through the opening as I sewed. The instructions said, about leaving the opening for turning: You will need to pull the Legs out through this opening, so don't make it too small. What they needed to say was: Basically hardly sew any of this seam.

Want to know what a frog looks like without eyes? This is it.


I was tempted to skip the rather complicated-looking eye sockets and just make some googly eyes, but I had already cut out the pieces, so I gave them a go.


Worth it. I left off the embroidered smile, as its head/chin seam was already very smile-like and subtle.

So now we come to the issue. How am I going to dress it? The limb-to-body joins aren't very elegant and in any case my legs aren't in the same place on the body, so something's got to cover that all up.

I like the old-fashioned swimsuit idea, it reminds me of a Frog and Toad story, but I think I'd like to try something different.


What outfit should my little frog wear?