Wednesday, 30 January 2013

Embroidery Course 2012 in review - Surface Embroidery

I'm about to start the second year of the Basic Course offered by the NSW Embroider's Guild, and I thought it was time to review the first year here on the blog.

The first subject we did was Surface Embroidery, which is a difficult category really as it includes so many stitches, and in some way can be defined by negatives (not counted, not on canvas, etc).
Most countries have their own embroidery traditions, so identifying surface stitches can be challenging, as the same stitch can have multiple names. With the growing impetus towards professionalisation and categorisation of needlework at the turn of the 20th century, particularly in Britain, there was a push to create standard names and examples of stitches. They were allocated into four loose groupings - chain, knot, loop and straight.

The classes for this subject were largely learning and practicing specific stitches as well as general presentation and finishing tips. We talked a little bit about how colour and thread choice can dramatically change the way stitches look. Most of our work was carried out on a 'doodle cloth' for experimentation, so we wouldn't worry about mistakes.

My doodle cloth
Our class assignments were to create samplers for each group of stitches.

Flat and Loop Stitches

Knot and Chain stitches
I didn't have any grand plans for my sampler designs, so I kept to a relatively small colour pallette and decided to use the name of the stitch group as a feature in each one. The point of a sampler, of course, is to give yourself a reference for the future, so all the samplers have been scanned and the scanned copies clearly labelled.

Monday, 21 January 2013

Bear! The fruits of a holiday stone-carving course.

I'm back! I've been honeymooning in Canada for a few weeks. It was an awesome trip: beautiful, relaxing and inspiring.

I love learning new things and when on holidays, you have the opportunity to learn crafts that are not available to you in your local area, or just from people with a different perspective. It can be hard to find craft courses when travelling, as most places don't seem to be trying to get to that market, just marketing to locals. I think craft tourism is pretty underdone.

Luckily I didn't miss this opportunity at Whistler, although I only just found it in our last few days there. Fathom stone art in the centre of town offer stone carving courses. I picked the 8-hour bear class. "Class" is a loose term, they aren't a scheduled, formal thing at all. If you're interested, contact them, arrange a time, and off you go.

Here's my lump of soapstone at the start. Not much to look at, yet.


You can sort of see my attempt to sketch a bear-like shape on the side. With a bit of guidance and a lot of nerves, I took to it with a saw for a few hours.


This was tedious work, so they managed to convince me to try the angle-grinder. Even more nerves, but a lot quicker.


It's quite intimidating using the grinder because any little wrong move was a massive chunk out of your work! I had to take a break here and regain some confidence, or at least remind myself how tedious the other option was, then go back to it.


Much better. Quite bearish. Time to go home and sleep. Then in the morning, time to start in with the files and sandpaper.


Much better!


See all that dust? About 1 million times that much dust was on me at this point. Now for the miraculous transformation. All this time working it has looked like a dusty grey lump of rock. But a quick rinse and oil later, and it's a frickin' stone sculpture!


All these colours and patterns appear out of nowhere.
 

I'm pretty proud.  And I had a great time. I learned a lot from the artists there (getting advice from whoever happened to be around at the time) and it feels like an achievement, a milestone. They all talk about "your first bear" like it's a rite of passage ("That's a good first bear", "Good work for your first bear", and "Better than so-and-so's first bear"), and like it's implied that you won't stop at one. They did give me some tools, so we shall see...

Wednesday, 9 January 2013

Vintage crochet - successes and failures

In my previous post on vintage crochet, I said I'd show some of the problems I've faced coping with vintage patterns.
I've been fascinated by gloves for a while now, and there are a number of vintage crochet glove patterns available.  I also gained a few crocheted examples in my amazing haul of vintage auction gloves that I mentioned in my last post.

Crocheted gloves from the auction.
The glove patterns suffer from the common problems - no real gauge given. The yarns are out of manufacture, and it is difficult to research equivalents. The size it is intended to make isn't often stated, and they have the loosest of instructions for larger or smaller sizes, usually written in two sentences at the very end of the pattern, where it is easy to overlook.
I tried a few glove patterns before I got as far as a thumb. One required me to make a very long chain and then join ensuring it didn't have a twist, which I find tricky, and after three attempts to start those ones I'd just crocheted three mรถbius strips.  With another I have no idea what size hook and thread it wanted, because my attempts either made such long starting wrist measurements that it would go round twice, or wouldn't get near it. I'd look at the small attempt, try a larger yarn - and suddenly be swimming in glove. Hmm. I still like the way that glove is supposed to work, so I want to make it work. 
Finally went back to a long chain start but worked it in foundation chain, which made keeping it from twisting significantly easier. 
Once that hurdle was cleared, the rest of the wrist and palm part of the gloves was simple. The thumb wasn't too hard, although I'm not sure I like the finished shape. But the fingers!

Vintage glove pattern, take one. Made from leftover baby hat cotton.
Oh, the fingers. The first one turned out ok: although it didn't fit well, it looked the right proportions. I'm still not exactly sure what went wrong with the weirdly misshapen tube that is the second finger. 

Patterns without a fixed gauge are far easier, and I've had more success with them - such as this crocheted jabot.

Crocheted Jabot from vintage pattern
Much happier with this! 

Tuesday, 1 January 2013

Vintage gloves and Christmas gloves

I love vintage clothes but suffer from one major drawback when it comes to buying them: I'm overweight.
Truth be told, even if I got down to my ideal target weight, I'd still be built on somewhat hefty lines for most vintage clothes. So when we were at an auction, the only things I thought might fit me were a men's dinner shirt and vest (I was correct; they are great) and gloves. As a result, I got a bit trigger-happy with my bids on gloves. I ended the day with 27 more pairs of vintage gloves than I'd started with.

Many vintage gloves - these ones fit me.

More vintage gloves - these ones are a bit tight.

Even more vintage gloves- these ones don't fit at all
My mother got quite excited when I posted some photos of these after I'd bought them and when she was over for my sister's wedding she tried on a few pairs. She fit into and took some lovely small kid gloves.

Vintage kid gloves. 

She also liked the look of some chamois gloves, and I agreed to decorate them with some embroidery as a Christmas present. I was happy to have gloves that weren't a fantastic fit given to a new home, and I always like giving gifts that I've spent some time and love embellishing.

These fit me but are a little short in the fingers, so I was happy to gift them.
  I decided on a small spray of fern stitch leaves and colonial knot berries to make a pattern around the hem of the cuff. Very Christmas gloves.

The decorated gloves.

A close up of the embroidery.
Among the gloves I bought were a few with embroidery; unfortunately those ones were too small for me:

The most gorgeous embroidered kid gloves. It looks like tambour chain to me. 

Lovely embroidered vintage gloves. Shame these were too small.
The next glove project is to select some of the many cream pairs that fit me - see the first photo, above - and embroider them in the style of these ones.

Friday, 21 December 2012

A Thank-You Hat

This year I was teaching 9 periods out-of-faculty. Even though this was in TAS, my first area of qualification, I haven't taught it for years, and hadn't taught any of the projects I was asked to teach. Suddenly in the workshop with classes in front of me and lots to learn, I was pretty well lost.

Luckily I had a colleague come to the rescue. Show me what to do. Come to my rescue with questions I couldn't answer or resources I couldn't find. Come into my class and help my students. Encourage, support, and inspire me.

Where would we be without colleagues like that.

So I wanted to make her something for Christmas. Something to show my gratitude and give her something my time and skill created, to pay for all the time and skill she shared with me.


Sorry for the photo. It was late at night when I finished and I had to gift it the next day. She loves it though, which is all that matters.

Thursday, 20 December 2012

Attempting to teach soft toy design

I mentioned earlier my choice to teach Soft Toy Design as a unit for Technology (Mandatory) this term. I try to ensure that I enjoy my job by making my job what I want it to be. Want to make puppets? Let's put on a Shapes Puppet Show. Want to design soft toys? Textiles time!

What an adventure. The kids had amazing ideas and were really enthusiastic (and that's always the best way to make sure they learn something). We researched, we discussed ethical design considerations, we sketched, we drew patterns, we learnt how to use the sewing machine.


Once we then started on the actual construction, some kids hit the reality wall of what they were trying to achieve. It doesn't seem to matter how many times you tell them to keep it simple. So some patterns underwent major editing, and some project were completely abandoned in favour of something more manageable. 


But this was good. In fact, this was a great experience.

The course is supposed to be centred around design. But it is hard to do that when students don't have a lot of skills, so most projects really focus on technologies and skills, with minimal design elements. I felt like this was real design. They faced the reality of design constraints, mainly time and skill restrictions. They evaluated and edited as they worked.


And in the end, like all good projects, I got sick, time ran out and we finished in a panic at the last possible moment!


The fellow on the right there is an adipose baby (Doctor Who), with hat and scarf (naturally).


I am extremely proud of what they managed to achieve and the lessons we all learned in the process. I had a fantastic time.


And we put some of our ethical design ideas into practice. This octopus is made from apron projects that previous classes either didn't finish or didn't want to take home. The straps and ties make excellent legs!


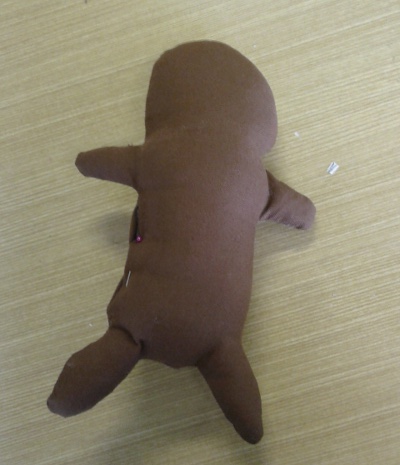
And to encourage them to finish all their theory work to a high standard, I gave the Zombie Bear to the best folio! And Violet Puffle and some Sock Snowmen to some runners up.

Friday, 14 December 2012

Spoonflower contest "Sweets"

This week's Spoonflower contest is Sweets (scatter print). Feeling Christmassy, I stuck to a standard theme of Gingerbread men.

But I wanted my men to be more than just your Joe Average gingerbread man. I wanted them to be classy.

So I present to you my entry, entitled "Gingerbread Gentlemen."


You can vote in this week's contest or look at the fabric in more detail here.